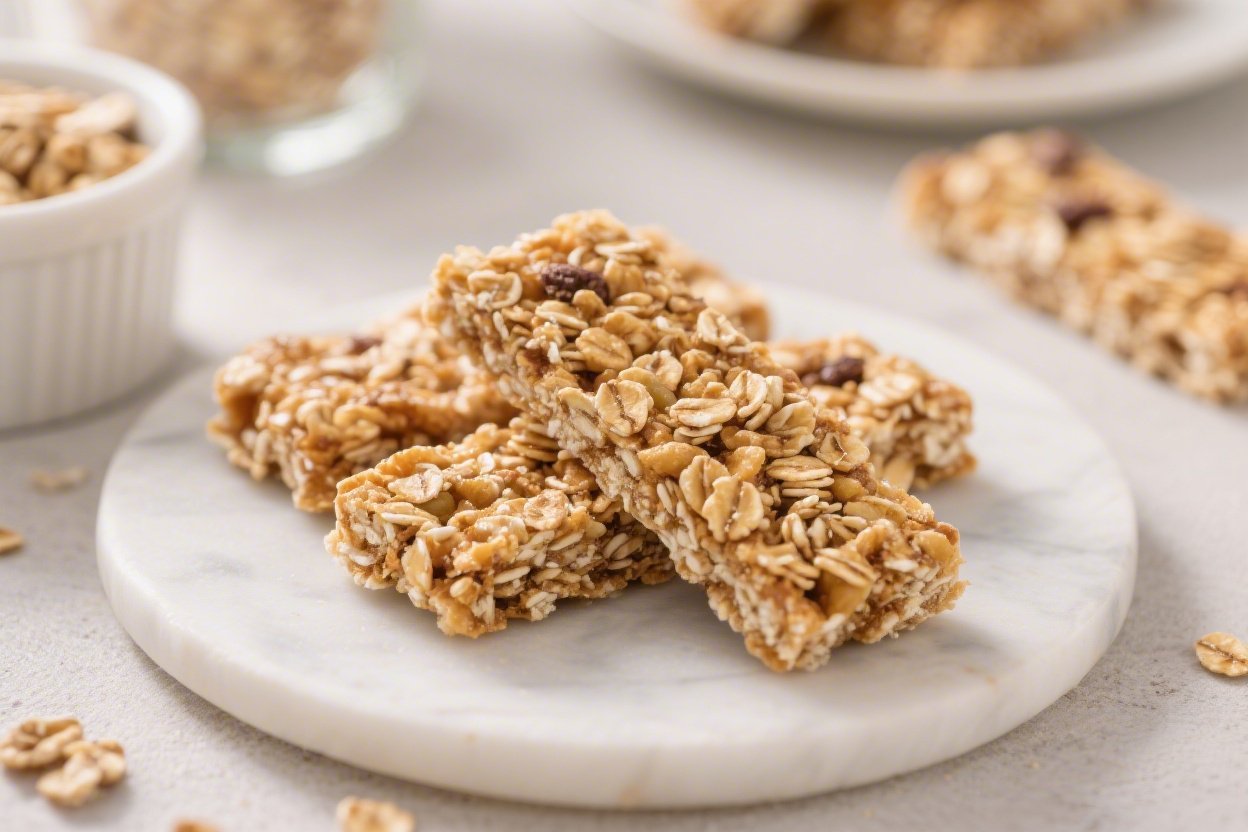
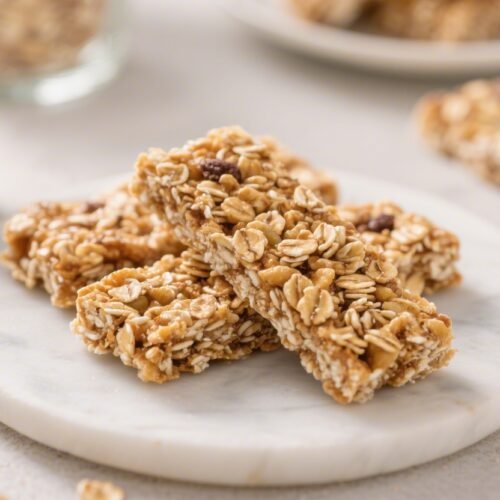
If you love a quick snack that actually fills you up, these Homemade No Bake Granola Bars are a game changer. They’re chewy, lightly sweet, and packed with texture. You can make them in minutes with pantry ingredients, and they set in the fridge—no oven, no fuss.
They’re perfect for busy mornings, lunch boxes, or a mid-afternoon boost. Plus, you control exactly what goes in, so they can be as wholesome or indulgent as you like.
What Makes This Special

These bars come together with simple staples: oats, nut butter, and a sweet binder like honey or maple syrup. The biggest win is no baking required, which keeps the texture soft and chewy.
They’re also highly customizable—swap nuts for seeds, use almond or peanut butter, and choose your favorite add-ins. The recipe scales easily, freezes well, and holds together beautifully without complicated steps. It’s a straightforward, reliable snack that feels homemade in the best way.
Shopping List
- Old-fashioned rolled oats (not quick oats)
- Nut or seed butter (peanut, almond, cashew, or sunflower seed butter)
- Honey or maple syrup (your main sweetener and binder)
- Vanilla extract
- Salt
- Chopped nuts (almonds, walnuts, pecans) or seeds (pumpkin, sunflower, chia, flax)
- Mix-ins such as mini chocolate chips, dried fruit (cranberries, raisins, chopped apricots), or unsweetened coconut flakes
- Optional add-ins: ground cinnamon, hemp hearts, protein powder, cocoa nibs
- Optional drizzle: melted dark chocolate
- Pan and liner: 8×8-inch square pan and parchment paper
Step-by-Step Instructions

- Line your pan. Use parchment paper to line an 8×8-inch pan, leaving extra overhang on two sides. This makes lifting the bars out much easier.
- Warm the binder. In a small pot over low heat, gently warm 1/2 cup nut or seed butter with 1/3–1/2 cup honey or maple syrup. Stir until smooth and slightly runny. Don’t boil—just loosen it up.
- Add flavor. Remove from heat and stir in 1 teaspoon vanilla extract and a pinch of salt. Adjust sweetness to taste.
- Combine dry ingredients. In a large bowl, add 2 1/2 cups rolled oats, 1/2–3/4 cup chopped nuts or seeds, and 1/3–1/2 cup mix-ins (like mini chocolate chips or dried fruit). If using delicate chocolate, reserve some to sprinkle on top.
- Mix it together. Pour the warm mixture over the oats. Stir well, making sure everything is evenly coated. If the bowl feels too warm for chocolate chips, let the mixture cool 3–5 minutes before stirring them in to prevent melting.
- Press firmly. Transfer to the lined pan. Use the back of a spatula or a piece of parchment to press the mixture down very firmly and evenly. Firm pressure is key for bars that hold their shape.
- Optional chocolate top. Sprinkle extra chocolate chips on top and press them in, or drizzle melted dark chocolate in thin lines.
- Chill to set. Refrigerate for at least 1–2 hours, or freeze for 30–40 minutes, until firm.
- Slice and serve. Lift the slab out using the parchment and cut into 10–12 bars or 16 squares. Wipe the knife between cuts for clean edges.
- Adjust texture if needed. If bars seem crumbly, next time add a bit more sweetener or nut butter. If they’re too soft, use slightly less sweetener or add a few more oats.
How to Store
- Fridge: Store in an airtight container, layered with parchment, for up to 1 week. They hold their shape best when chilled.
- Freezer: Freeze for up to 2–3 months. Wrap individually for grab-and-go convenience. Thaw at room temperature for 10–15 minutes.
- Room temperature: Safe for a day in a lunchbox, but they may soften if it’s warm. Keep away from direct sunlight or heat.
Benefits of This Recipe
- Quick and easy: No oven, minimal dishes, ready to chill in 10 minutes.
- Customizable: Works with many nut butters, seeds, and mix-ins, including allergy-friendly options.
- Balanced energy: Oats and nuts provide fiber, healthy fats, and some protein, helping you stay full.
- Budget-friendly: Uses pantry staples and stretches well for snacks all week.
- Kid-approved: Soft, chewy texture with fun mix-ins like chocolate or fruit.
What Not to Do
- Don’t skip pressing firmly. Loose packing leads to crumbly bars.
- Don’t use quick oats or steel-cut oats. Quick oats get mealy; steel-cut won’t soften properly. Rolled oats are best.
- Don’t overheat the sweetener mixture. Boiling can change the texture and make bars hard or sticky.
- Don’t overload with mix-ins. Too many add-ins prevent the binder from holding everything together. Aim for about 3/4 to 1 cup total.
- Don’t cut before chilling. Warm bars won’t hold their shape. Let them set first.
Alternatives
- Sweeteners: Swap honey with maple syrup or brown rice syrup. For less sweetness, use half syrup and half unsweetened applesauce, then increase nut butter slightly.
- Nut-free: Use sunflower seed butter or tahini. Choose seeds (pumpkin, sunflower, chia) instead of nuts.
- Protein boost: Add 1–2 scoops of protein powder. If the mixture gets dry, add a tablespoon of extra nut butter or a splash of milk.
- Chocolate lovers: Stir in mini chips and cocoa nibs, and drizzle the top with melted dark chocolate.
- Fruit-forward: Use chopped dried cherries, apricots, or dates with a pinch of cinnamon and coconut flakes.
- Spice it up: Add ground cinnamon, cardamom, or pumpkin pie spice for a warm flavor.
- Gluten-free: Use certified gluten-free oats.
FAQ
Why are my granola bars falling apart?
Usually it’s a ratio or packing issue. Make sure you measure the oats and binder accurately, warm the nut butter and sweetener until smooth, and press the mixture very firmly into the pan.
If needed, add a tablespoon or two more honey or nut butter next time.
Can I make these vegan?
Yes. Use maple syrup or brown rice syrup instead of honey, and choose dairy-free chocolate. Everything else is naturally plant-based.
Can I reduce the sugar?
You can, but the sweetener also acts as a binder.
Try reducing by 1–2 tablespoons and add a bit more nut butter to compensate. Keep in mind that less syrup may yield slightly more fragile bars.
Do I have to refrigerate them?
Refrigeration helps them firm up and stay chewy. They can sit at room temperature for a few hours, but for best texture and clean slices, store them in the fridge.
What kind of oats work best?
Old-fashioned rolled oats are ideal.
Quick oats turn soft and pasty, and steel-cut oats don’t hydrate. If you like extra texture, lightly toast the rolled oats on the stovetop before mixing.
How can I make them more crunchy?
Stir in crunchy mix-ins like toasted nuts or seeds, rice cereal, or cacao nibs. Press firmly and chill well.
You can also toast the oats for a firmer bite.
My chocolate chips melted—what happened?
The mixture was likely too warm when you added them. Let it cool for a few minutes after heating the binder, or sprinkle the chips on top and press them in rather than mixing immediately.
Can I double the recipe?
Absolutely. Use a 9×13-inch pan and keep the thickness even across the surface.
Chill a bit longer to set.
Are these good for kids’ lunch boxes?
Yes. They’re soft and not messy if kept cool. For nut-free schools, use sunflower seed butter and seeds instead of nuts, and wrap bars individually for easy packing.
How long do they last in the freezer?
Up to 2–3 months. Wrap each bar and store in a freezer-safe bag or container. Thaw briefly at room temperature or in the fridge.
Final Thoughts
Homemade No Bake Granola Bars are the kind of snack that fits everyone’s routine: simple to make, easy to customize, and reliably satisfying. Once you try a batch, you’ll quickly figure out your favorite mix-ins and ideal sweetness level.
Keep a pan in the fridge for quick breakfasts, post-workout bites, or after-school snacks. With just a few pantry ingredients and a little pressing power, you’ve got chewy, homemade bars any day of the week.
Homemade No Bake Granola Bars
Ingredients
- Old-fashioned rolled oats (not quick oats)
- Nut or seed butter (peanut, almond, cashew, or sunflower seed butter)
- Honey or maple syrup (your main sweetener and binder)
- Vanilla extract
- Salt
- Chopped nuts (almonds, walnuts, pecans) or seeds (pumpkin, sunflower, chia, flax)
- Mix-ins such as mini chocolate chips, dried fruit (cranberries, raisins, chopped apricots), or unsweetened coconut flakes
- Optional add-ins: ground cinnamon, hemp hearts, protein powder, cocoa nibs
- Optional drizzle: melted dark chocolate
- Pan and liner: 8x8-inch square pan and parchment paper
Instructions
- Line your pan. Use parchment paper to line an 8x8-inch pan, leaving extra overhang on two sides. This makes lifting the bars out much easier.
- Warm the binder. In a small pot over low heat, gently warm 1/2 cup nut or seed butter with 1/3–1/2 cup honey or maple syrup. Stir until smooth and slightly runny. Don’t boil—just loosen it up.
- Add flavor. Remove from heat and stir in 1 teaspoon vanilla extract and a pinch of salt. Adjust sweetness to taste.
- Combine dry ingredients. In a large bowl, add 2 1/2 cups rolled oats, 1/2–3/4 cup chopped nuts or seeds, and 1/3–1/2 cup mix-ins (like mini chocolate chips or dried fruit). If using delicate chocolate, reserve some to sprinkle on top.
- Mix it together. Pour the warm mixture over the oats. Stir well, making sure everything is evenly coated. If the bowl feels too warm for chocolate chips, let the mixture cool 3–5 minutes before stirring them in to prevent melting.
- Press firmly. Transfer to the lined pan. Use the back of a spatula or a piece of parchment to press the mixture down very firmly and evenly. Firm pressure is key for bars that hold their shape.
- Optional chocolate top. Sprinkle extra chocolate chips on top and press them in, or drizzle melted dark chocolate in thin lines.
- Chill to set. Refrigerate for at least 1–2 hours, or freeze for 30–40 minutes, until firm.
- Slice and serve. Lift the slab out using the parchment and cut into 10–12 bars or 16 squares. Wipe the knife between cuts for clean edges.
- Adjust texture if needed. If bars seem crumbly, next time add a bit more sweetener or nut butter. If they’re too soft, use slightly less sweetener or add a few more oats.