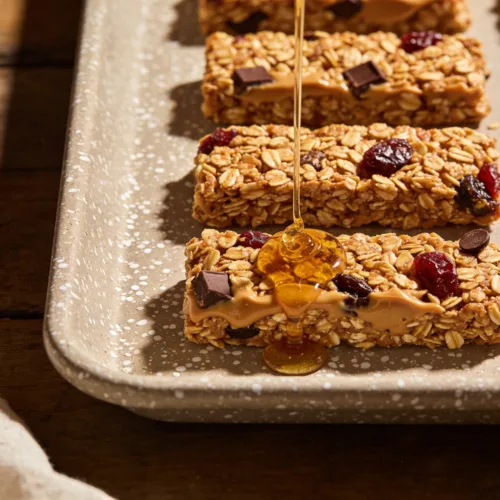
Easy No Bake Granola Bars: Quick, Chewy Treats
A wholesome, no-bake treat with a hearty oat base bound by nut butter and sweetened to perfection. Chewy, satisfying, and endlessly adaptable, these bars are perfect for busy days, school snacks, or a quick dessert that still feels homemade and comforting.
Ingredients
For the Oat Base
- 2 cups rolled oats
- 1/4 teaspoon fine sale
- 1/4 teaspoon chinnamon
For the Binder
- 1 cup nut or seed butter (Personal favorite peanut butter)
- 1/2 cup honey or pure maple syrup
- 1 teaspoon vanilla extract
Mix-In Options (choose your favorites)
- 1/4 cup chopped nuts or seeds (walnuts, almonds, pumpkin seeds, or sunflower seeds)
- 1/2 cup dried fruit or chocolate chips (raisins, cranberries, ...)
Instructions
Step 1: Prep the Dry Base
- In a large mixing bowl, combine the rolled oats, salt, and cinnamon if using. Stir in any nuts or seeds at this stage so they get evenly distributed before the wet ingredients go in. Line an 8×8-inch (or similar) baking dish with parchment paper, leaving a little overhang on the sides so the bars are easy to lift out later.
Step 2: Warm the Binder
- In a small saucepan over low heat, combine the nut butter, honey or maple syrup, and vanilla extract. Stir gently for 2–3 minutes until the mixture is smooth, glossy, and fully combined. Don't let it boil — you just want it warm and pourable. Alternatively, microwave in 30-second bursts, stirring between each, until fluid.
Step 3: Combine Everything
- Pour the warm nut butter mixture over the oat base and stir thoroughly until every oat is coated and the mixture looks evenly moistened. Fold in your chosen mix-ins — chocolate chips, dried fruit, or extra seeds — and stir just until distributed. Work quickly before the mixture starts to firm up as it cools.
Step 4: Press and Set
- Transfer the mixture to the prepared dish and press it down firmly and evenly using the back of a spatula or the flat bottom of a measuring cup. The more firmly you press, the better the bars will hold together after cutting. Smooth the top as flat as possible.
Step 5: Chill and Cut
- Refrigerate for at least 1 hour, or until fully set and firm to the touch. Use the parchment overhang to lift the slab out of the dish and onto a cutting board. Slice into 10–12 bars of your preferred size. Store in an airtight container in the refrigerator for up to 1 week, or freeze individually wrapped bars for up to 2 months.